Bodrograd Map
We have already installed Unity and opened the project, which now looks like this:
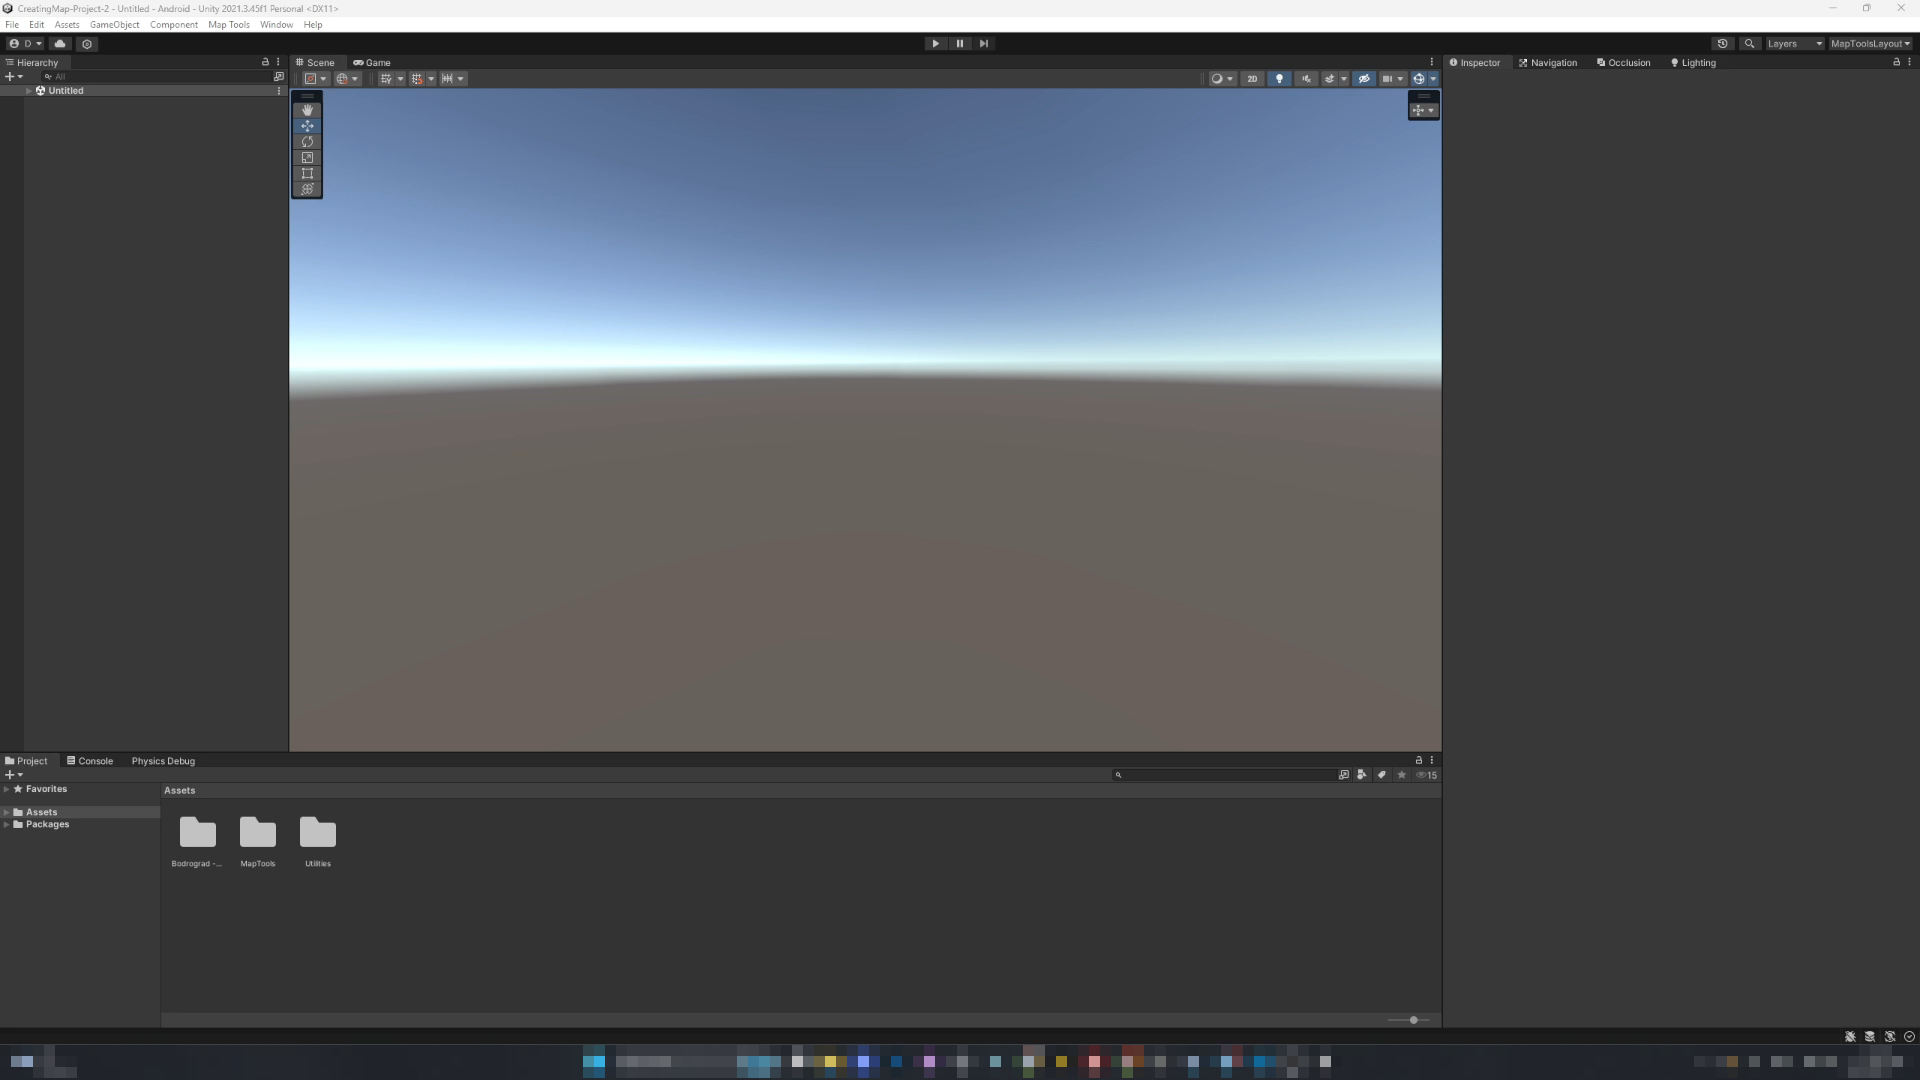
The project is fully configured for map creation and includes all the necessary resources.
In this project, the "Bodrograd" map has been created. You can check out its appearance as an example.
Opening the "Bordograd - Scene" Scene
To open the scene, follow these steps:
After loading the scene, you will see the familiar map already present in the game.
Structure of the "Bodrograd - Sample Map"
Folders and Files
The main map folder is ResourcesMap, which contains all the necessary files (models, materials, etc.), as well as the scene file Bordograd - Scene and the map screenshot icoMapBodrograd.
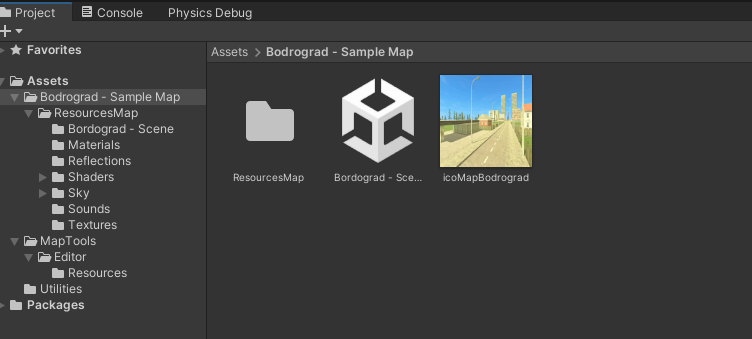
For each map, the following structure must be maintained:
- Folder:
ResourcesMap - Scene file in the format
MapName - Scene - Map screenshot
We will soon explain why this is important.
Scene Structure
Below is the structure of the scene:
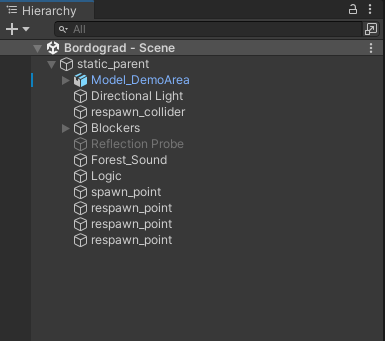
- static_parent — contains all the objects that do not move on the map (this is required for optimization).
- Model_DemoArea — the 3D model of the map.
- Directional Light — the light source. Without it, the scene will be dark; it can be adjusted.
- respawn_collider — an invisible object that triggers a respawn when touched by the player.
- Blockers — walls along the perimeter of the map that prevent the player from falling off.
- Reflection Probe — an object that enables reflections. Learn more about this here
- Forest_Sound — an object that plays forest sounds to create ambient background audio.
- Logic — an object with the
TreesDisabler.csscript that disables trees based on game settings. - spawn_point — the initial spawn point for the player.
- respawn_point — a potential respawn point for the player.
In the game, the objects static_parent, spawn_point, respawn_point, and respawn_collider will be processed. Their names must be written exactly in lowercase. These objects are known as handler objects.
For the map to launch correctly, the handler object static_parent is required, as it sets the player's spawn location. Without it, the player will appear at coordinates (0,0,0), which is not acceptable.
There are several other handler objects available. Learn more about these here.
Model_DemoArea — The 3D Map Model
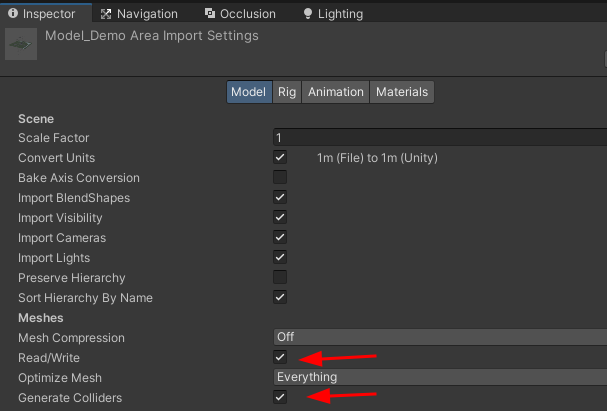
The model was created in Blender 4.2 and exported to Unity in FBX format with the following settings:
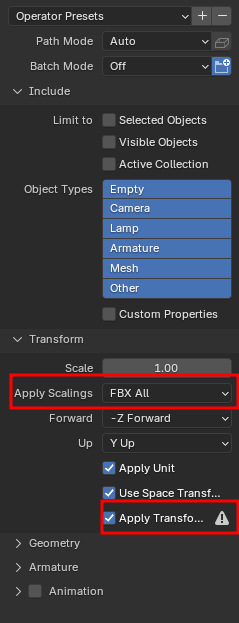
Every 3D object must have a Collider component (Box Collider or Mesh Collider). If you are using a 3D file in FBX or another format, make sure to enable the Read/Write option. Without this, the Mesh Collider may not work, and the player could pass through the object.
You can enable the Generate Colliders option to automatically create a Mesh Collider. However, for some objects, it is recommended to manually add a Box Collider or enable the Convex mode for optimization.
The source files for the model can be found in the Demo Area - Sources folder (the file with a .blend extension).
On the following pages of the documentation, we will cover the process of creating your own map.